I found and ordered ELP’s stereo camera to calculate depth maps with OpenCV and see what I could do with them. It turns out that just getting a decent depth map was much more involved than I expected. Read and download my code here.
I chose the ELP camera because it looked like a low-effort way to get working stereo camera hardware. You can probably get similar image quality for less by building one yourself – this person used wood, glue, and duct tape to hold two cameras in place.
When I bought it, the camera was poorly rated at 2.5 stars. Most of the critical reviews were about out-of-sync images and being unable to use both cameras at a good resolution simultaneously. I suspected these issues were the result of a lack of documentation and user error, so I risked the purchase anyway.
Getting synchronized, full-resolution images
Getting an image
After receiving the camera, my first step was to get images of any kind from it. First, I installed Python, OpenCV, and the OpenCV-Python bindings, then I slightly modified this OpenCV tutorial so that it used two cameras:
import cv2

left = cv2.VideoCapture(0)
right = cv2.VideoCapture(1)

while(True):
    if not (left.grab() and right.grab()):
        print("No more frames")
        break

    _, leftFrame = left.retrieve()
    _, rightFrame = right.retrieve()

    cv2.imshow('left', leftFrame)
    cv2.imshow('right', rightFrame)
    if cv2.waitKey(1) & 0xFF == ord('q'):
        break

left.release()
right.release()
cv2.destroyAllWindows()
On my Linux machine, I didn’t have to install any drivers – it just worked out of the box.
The example used read() to get a frame. read()’s documentation claims that it “grabs, decodes, and returns the next video frame”. This means that if you call read() twice in a row, there will be a decode step between the two grabs which can introduce a significant delay between the left and right images. I reduced this delay by grabbing both images with explicit calls to grab() before decoding them with retrieve().
The ELP camera enumerates as two separate cameras, hence the separate left and
right VideoCapture instances. For a proper stereo camera with a common clock,
use one VideoCapture instance and pass in whether you want the 0th or 1st camera
in retrieve(). You might need to change the values passed into VideoCapture to 1
and 2 if camera 0 is your computer’s built in webcam.
Increasing the resolution
By default, the ELP cameras output video at 640x480. I didn’t think I would be able to get a good depth map from that resolution, so my next step was to try to increase it to their claimed maximum of 1280x720.
If you’re using different cameras, v4l2-ctl on Linux can list their supported
resolutions:
$ sudo v4l2-ctl -d /dev/video0 --list-formats-ext
ioctl: VIDIOC_ENUM_FMT
	Index       : 0
	Type        : Video Capture
	Pixel Format: 'YUYV'
	Name        : YUYV 4:2:2
		Size: Discrete 1280x720
			Interval: Discrete 0.100s (10.000 fps)
			Interval: Discrete 0.200s (5.000 fps)
                ...
		Size: Discrete 640x480
			Interval: Discrete 0.033s (30.000 fps)
			Interval: Discrete 0.067s (15.000 fps)
                ...

	Index       : 1
	Type        : Video Capture
	Pixel Format: 'MJPG' (compressed)
	Name        : Motion-JPEG
		Size: Discrete 1280x720
			Interval: Discrete 0.033s (30.000 fps)
			Interval: Discrete 0.040s (25.000 fps)
			Interval: Discrete 0.067s (15.000 fps)
                ...
In OpenCV, camera resolution is available as the VideoCapture
properties CAP_PROP_FRAME_WIDTH and
CAP_PROP_FRAME_HEIGHT. The VideoCapture class has
get() and set() methods to
access these properties:
CAMERA_WIDTH = 1280
CAMERA_HEIGHT = 720

left.set(cv2.CAP_PROP_FRAME_WIDTH, CAMERA_WIDTH)
left.set(cv2.CAP_PROP_FRAME_HEIGHT, CAMERA_HEIGHT)
right.set(cv2.CAP_PROP_FRAME_WIDTH, CAMERA_WIDTH)
right.set(cv2.CAP_PROP_FRAME_HEIGHT, CAMERA_HEIGHT)
After these changes, I got the error VIDIOC_STREAMON: No space left on device.
This error actually means that the cameras need more bandwidth than the
controller can provide. I tried to decrease the
bandwidth requirements by forcing the MJPG encoding after setting the
resolution:
left.set(cv2.CAP_PROP_FOURCC, cv2.VideoWriter_fourcc(*"MJPG"))
right.set(cv2.CAP_PROP_FOURCC, cv2.VideoWriter_fourcc(*"MJPG"))
… but it didn’t work. At the time, I was running Linux Mint 18.2. Even though that was the latest release, its OpenCV was stuck at 2.4.9.1, and it seemed to have a bug where setting the encoding didn’t have any effect. As of this post, OpenCV 2.4.9 is over three years old!
This wasn’t the first time I was frustrated with Debian derivatives’ out-of-date packages. When working on my Hugo-generated website, I could only get a recent Hugo by installing a flatpak. I couldn’t even build Hugo from source because the available Go compiler was also too old.
My “fix” for these was to install Gentoo switch to Arch Linux using
Antergos’ simple graphical installer. Once I finished
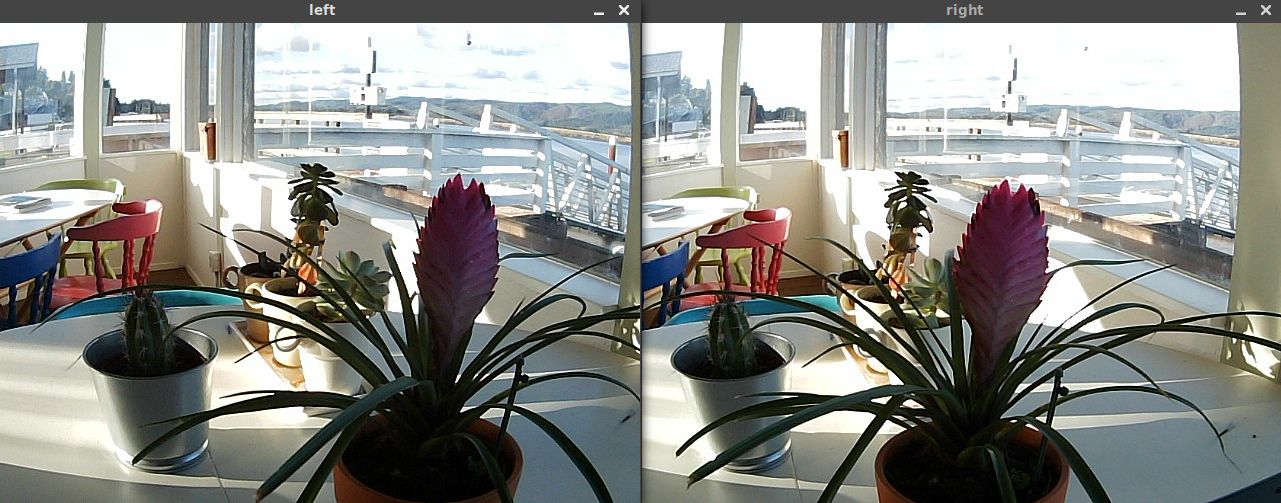
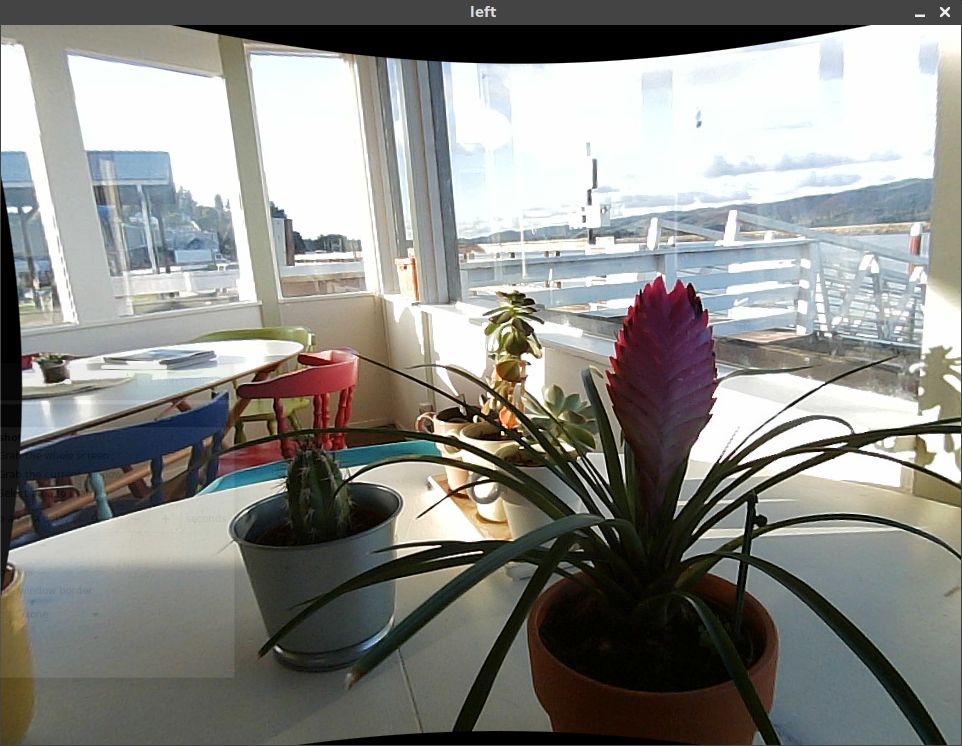
installing everything again, the MJPG encoding worked and I was able to get
video from both cameras at 1280x720 simultaneously (which is large enough that
both don’t fit on my screen):
Calibrating the cameras
Stereo correspondence algorithms rely on undistorted and rectified source images. Specifically, straight lines in the real world need to be straight in the images, and the images need to be aligned with each other. Out of the box, the ELP camera has plenty of distortion which I fixed by calibrating it.
Capturing calibration data
Before calibrating, I needed to get some calibration data. I printed out a chessboard, taped it to a clipboard, and added this to the code above to save the frames for later use (full capture code here):
# Different directories for each camera
LEFT_PATH = "capture/left/{:06d}.jpg"
RIGHT_PATH = "capture/right/{:06d}.jpg"

# Filenames are just an increasing number
frameId = 0

# Capture loop from earlier...
while(True):
    # Actually save the frames
    cv2.imwrite(LEFT_PATH.format(frameId), leftFrame)
    cv2.imwrite(RIGHT_PATH.format(frameId), rightFrame)
    frameId += 1
The chessboard I used is available here. You might need to enable background colors while printing. After printing, take note of how many corners are visible.
Calibrating the cameras individually
OpenCV has a pretty good tutorial on calibrating a single camera. The gist of it is to extract the locations of the corners from these chessboard pictures with findChessboardCorners() and use the corners to calibrate the camera with calibrateCamera(). To correct just a single camera, calculate an undistortion matrix from the calibration with getOptimalNewCameraMatrix() and initUndistortRectifyMap(). Once you have the undistortion matrix, use it to fix your image with remap().
The main difference between the single-camera calibration of my implementation and the tutorial is that mine caches the chessboard corner locations. This was the slowest step for me, so caching saved me plenty of time while I experimented with the calibration parameters and figured out the other necessary stages.
Before running my calibration script, make sure to update CHESSBOARD_SIZE to
match the geometry of the corners in your chessboard.
The first time I tried calling calibrateCamera(), I noticed it was taking forever. I ended up killing the process after it had been calibrating for about an hour. I noticed that other calibration tools were only using a few hand-picked images but I was trying to calibrate with around a thousand frames of chessboards, so my quick fix to this was to take a random sample of 64 images:
MAX_IMAGES = 64
if (len(filenames) > MAX_IMAGES):
    print("Too many images to calibrate, using {0} randomly selected images"
            .format(MAX_IMAGES))
    filenames = random.sample(filenames, MAX_IMAGES)
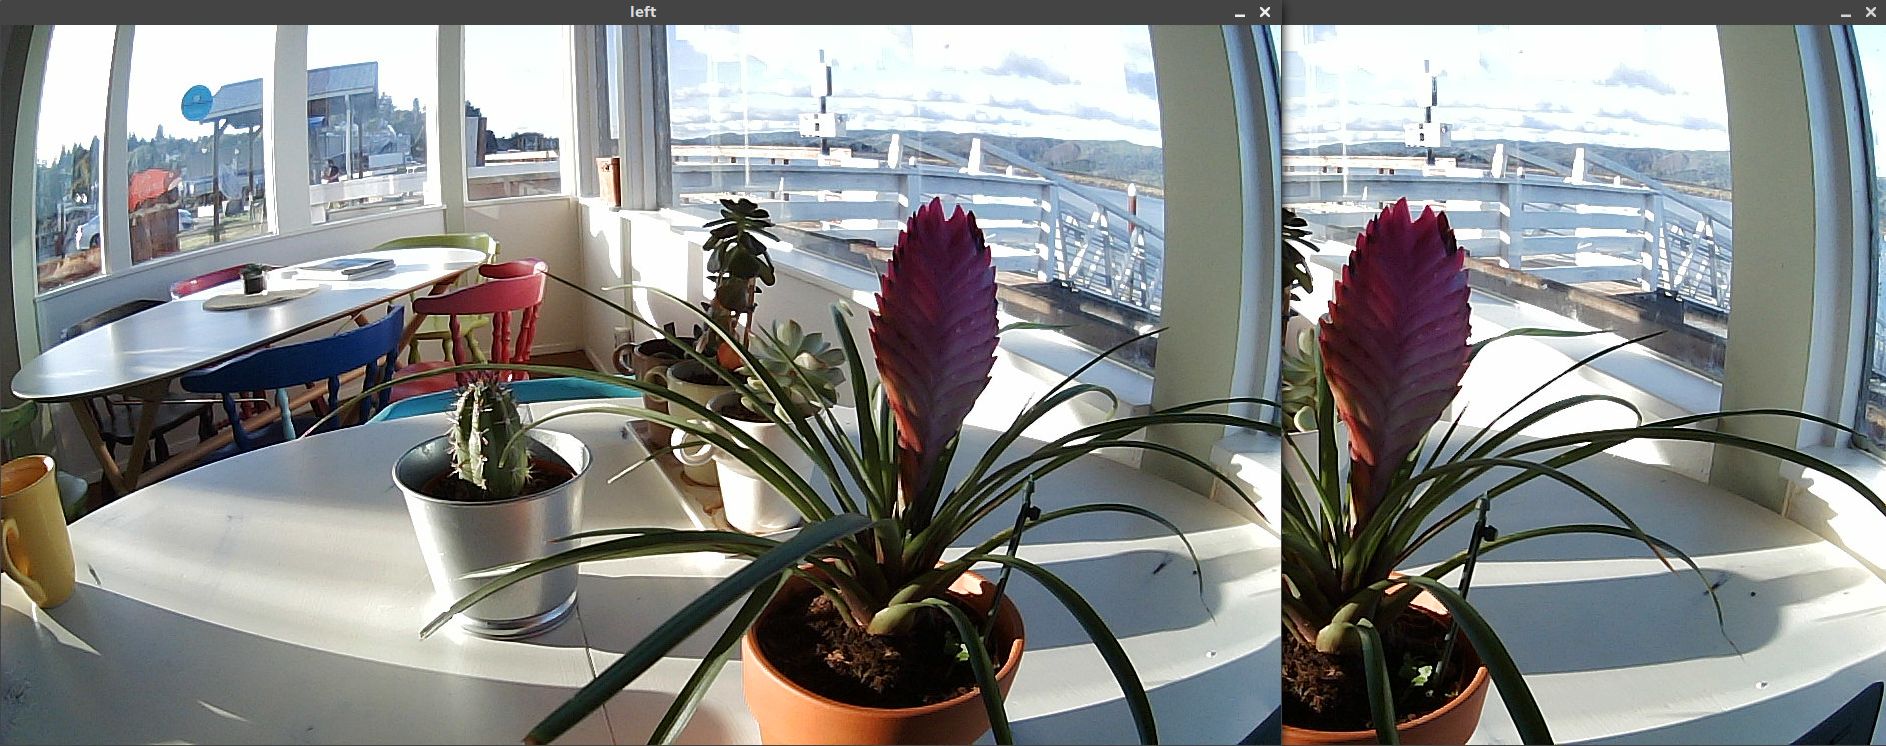
Then, calibrating succeeded but the supposedly “undistorted” result ended up worse than the original:
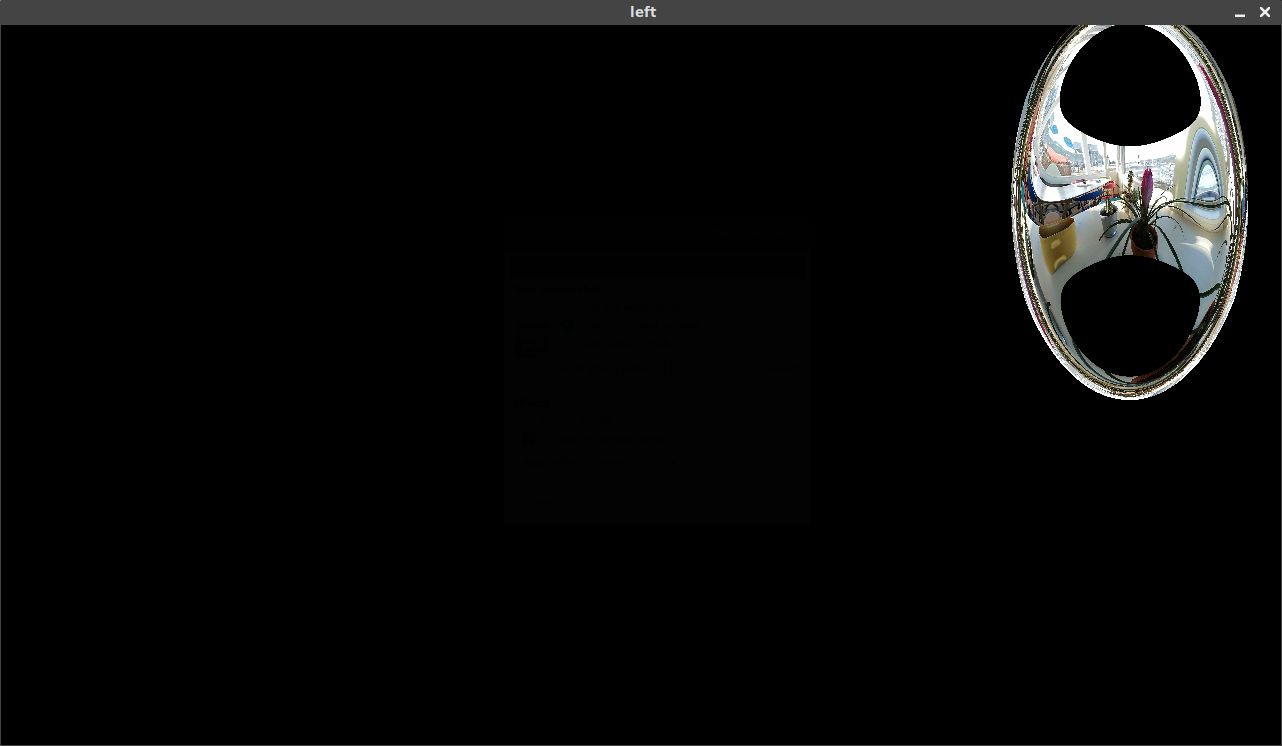
An anonymous comment to this review suggested that I should try cropping the image:
I was able to calibrate with opencv, but because of the distortion of the camera lens, the calibration could not be applied to the entire image.
OpenCV images in Python are just NumPy arrays, so I cropped the images to 4:3, or 960x720 in this case, by using array slicing:
CROP_WIDTH = 960
def cropHorizontal(image):
    return image[:,
            int((CAMERA_WIDTH-CROP_WIDTH)/2):
            int(CROP_WIDTH+(CAMERA_WIDTH-CROP_WIDTH)/2)]
Most of the chessboards in my existing calibration data were cut off after cropping. I ended up taking new chessboard images with the crop applied during capture so I could avoid bringing the chessboard out of frame. After recalibrating, I was able to get good results with straight lines:
Calibrating the cameras together and rectifying
The next step to correct a stereo pair is to determine the rotation and vertical offset between the two cameras using stereoCalibrate():
(_, _, _, _, _, rotationMatrix, translationVector, _, _) = cv2.stereoCalibrate(
        objectPoints, leftImagePoints, rightImagePoints,
        leftCameraMatrix, leftDistortionCoefficients,
        rightCameraMatrix, rightDistortionCoefficients,
        imageSize, None, None, None, None,
        cv2.CALIB_FIX_INTRINSIC, TERMINATION_CRITERIA)
Finally, use stereoRectify() and initUndistortRectifyMap() to convert the rotation and vertical offset into remapping matrices that can be directly used to correct the stereo pair:
(leftRectification, rightRectification, leftProjection, rightProjection,
        dispartityToDepthMap, leftROI, rightROI) = cv2.stereoRectify(
                leftCameraMatrix, leftDistortionCoefficients,
                rightCameraMatrix, rightDistortionCoefficients,
                imageSize, rotationMatrix, translationVector,
                None, None, None, None, None,
                cv2.CALIB_ZERO_DISPARITY, OPTIMIZE_ALPHA)

leftMapX, leftMapY = cv2.initUndistortRectifyMap(
        leftCameraMatrix, leftDistortionCoefficients, leftRectification,
        leftProjection, imageSize, cv2.CV_32FC1)
rightMapX, rightMapY = cv2.initUndistortRectifyMap(
        rightCameraMatrix, rightDistortionCoefficients, rightRectification,
        rightProjection, imageSize, cv2.CV_32FC1)
NumPy makes it easy to save the calibration for later use:
np.savez_compressed(outputFile, imageSize=imageSize,
        leftMapX=leftMapX, leftMapY=leftMapY, leftROI=leftROI,
        rightMapX=rightMapX, rightMapY=rightMapY, rightROI=rightROI)
The calibration for my ELP camera is available here, but you may need to recalibrate anyway because of manufacturing irregularities that result in camera differences.
Calculating a depth map
Now that the cameras are fully calibrated and rectified, they can be used to generate depth maps. First, load the calibration:
calibration = np.load(sys.argv[1], allow_pickle=False)
imageSize = tuple(calibration["imageSize"])
leftMapX = calibration["leftMapX"]
leftMapY = calibration["leftMapY"]
leftROI = tuple(calibration["leftROI"])
rightMapX = calibration["rightMapX"]
rightMapY = calibration["rightMapY"]
rightROI = tuple(calibration["rightROI"])
Then, in a capture loop similar to my first example on this page, undistort the images using remap(), convert them to grayscale with cvtColor(), and compute the depth map with a StereoBM object:
stereoMatcher = cv2.StereoBM_create()

fixedLeft = cv2.remap(leftFrame, leftMapX, leftMapY, REMAP_INTERPOLATION)
fixedRight = cv2.remap(rightFrame, rightMapX, rightMapY, REMAP_INTERPOLATION)

grayLeft = cv2.cvtColor(fixedLeft, cv2.COLOR_BGR2GRAY)
grayRight = cv2.cvtColor(fixedRight, cv2.COLOR_BGR2GRAY)
depth = stereoMatcher.compute(grayLeft, grayRight)
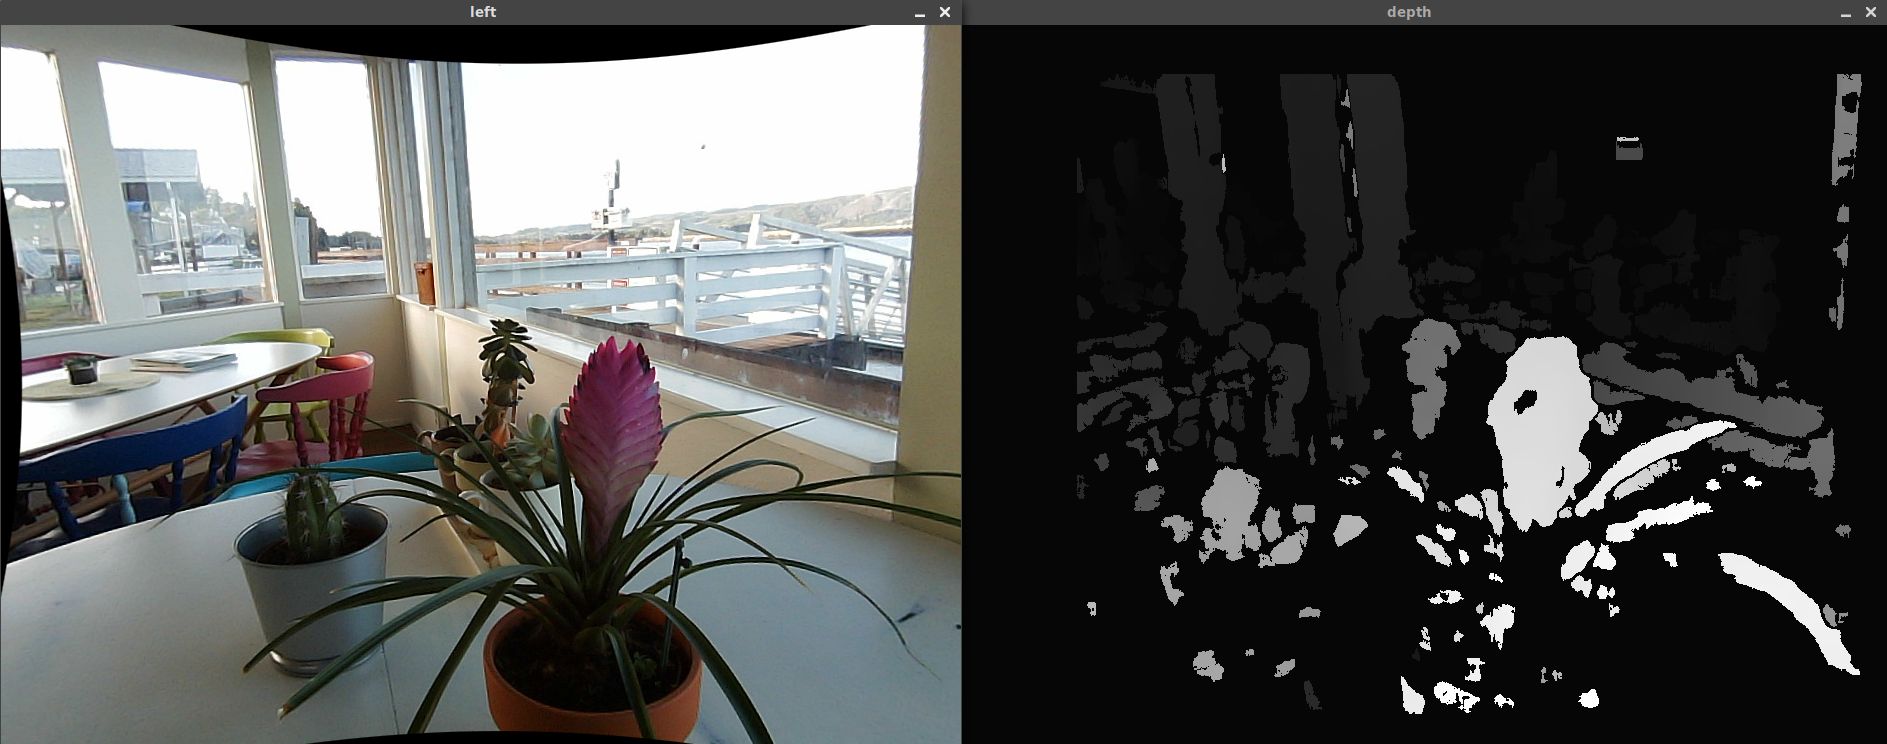
When previewing the depth map, you’ll need to scale it down to a visible range before showing it:
DEPTH_VISUALIZATION_SCALE = 2048
cv2.imshow('depth', depth / DEPTH_VISUALIZATION_SCALE)
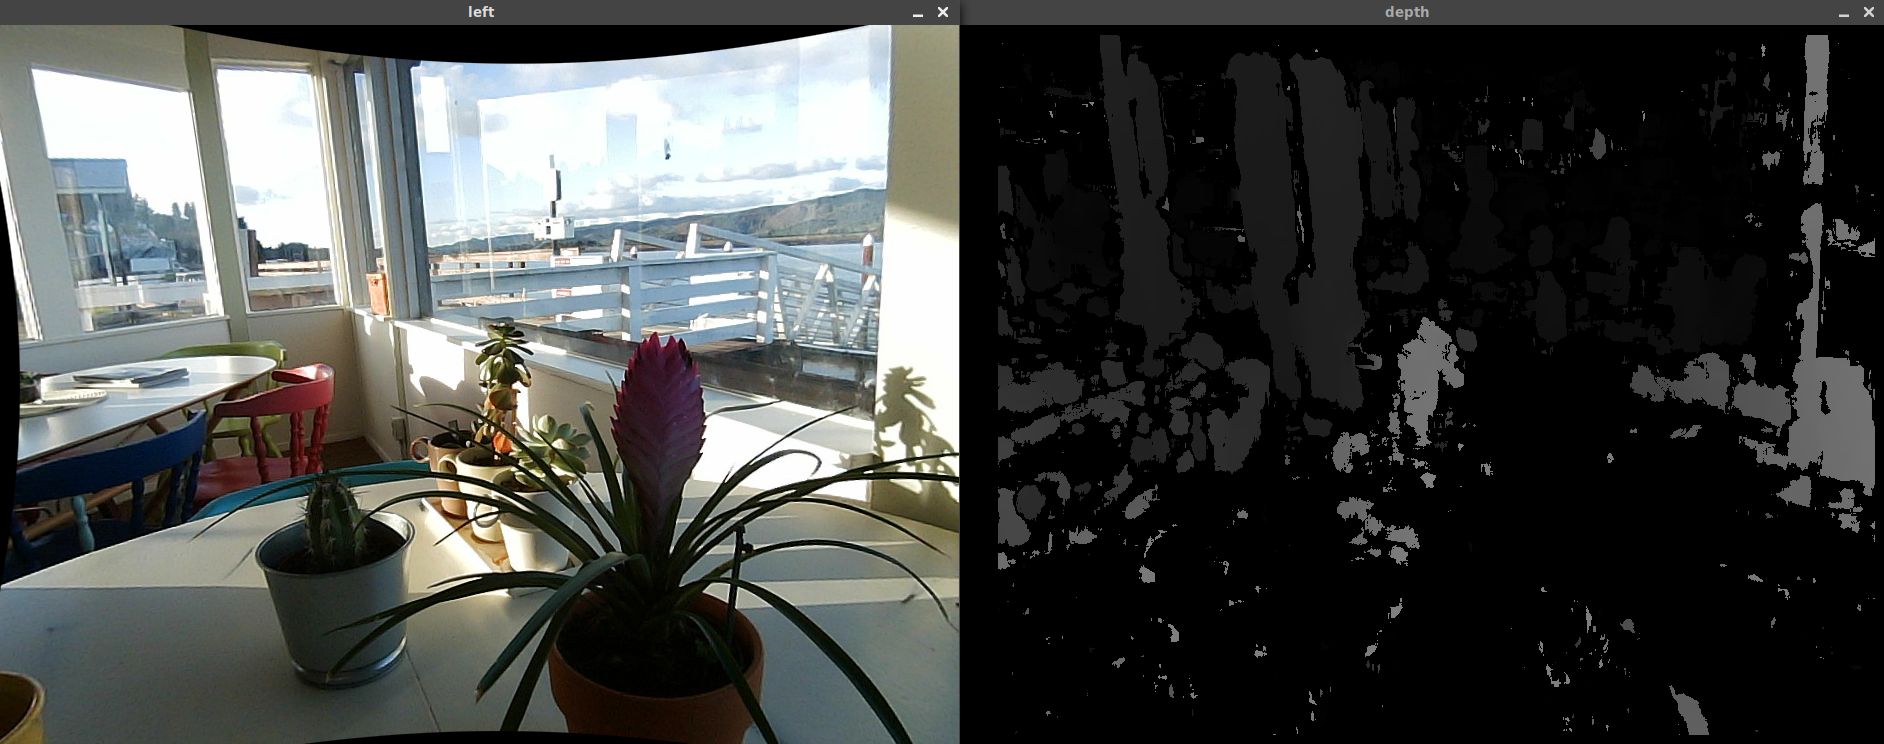
This image was a bit noisy. StereoBM has some properties that adjust the stereo correlation search range and noise removal parameters, among others. I found that these work well enough for me:
stereoMatcher.setMinDisparity(4)
stereoMatcher.setNumDisparities(128)
stereoMatcher.setBlockSize(21)
stereoMatcher.setSpeckleRange(16)
stereoMatcher.setSpeckleWindowSize(45)
You may need to tune these and modify other StereoBM properties I didn’t mention for your setup. While tuning, I just edited the numbers I passed in, but someone else built a GUI to make it easier. With these properties set, I got much better results: