I was looking for a white elephant gift, and the silliness of this animatronic Christmas tree was too hard to pass up. The humor wore off after the third time I heard it sing, so I decided to make it useful by adding Alexa.
For context, the tree originally played a song, and motors in its mouth and body made it sing and dance to the music. This is all the tree was designed to do:
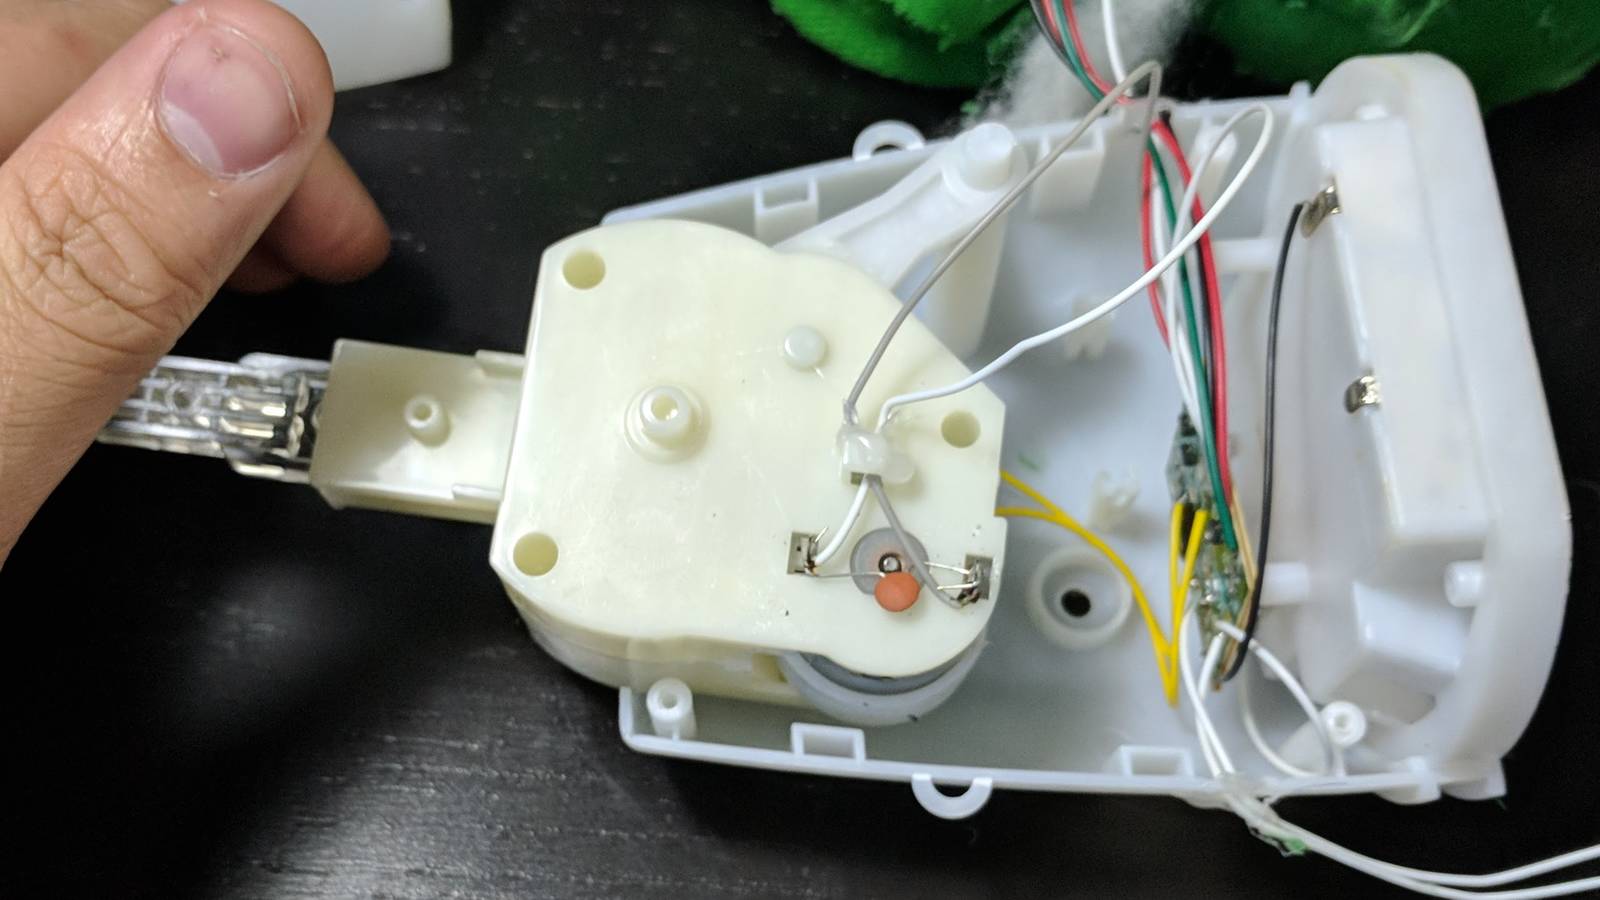
The first step was to take the tree apart to see what components can be reused. Fortunately, this was relatively easy – aside from the short section of fabric I had to cut and two small blobs of hot glue used for strain relief, all of the components were held in place with screws.
Building new hardware
Once I had the tree’s electronics enclosure out, I could start picking parts and building hardware to replace its original circuits.
Choosing parts
I had two main constraints for parts: they had to fit inside the enclosure for neatness, and I needed to be able to buy the parts in person to finish it on time for Christmas. While this meant that all of the Raspberry Pi HATs were out of the question, Vetco Electronics has an excellent selection of more generic parts near Seattle.
Here’s what I ended up using:
- Raspberry Pi Zero W1 for wakeword detection and to communicate with the Alexa Voice Service. The enclosure is too small to fit a gutted Echo Dot or a full-sized Pi.
- Sabrent USB audio adapter for audio I/O because no Raspberry Pi has a built-in input. I had a few of these lying around. They’re fairly compact and work well, so it seemed like a natural choice.
- Micro-USB OTG adapter to plug in the audio adapter since the Pi Zero only has micro-USB ports for compactness.
- LM386-based amplifier circuit to drive the existing speaker. While it doesn’t provide the best audio quality, it’s good enough for audible speech.
- Electret microphone2 to listen for commands. The datasheet suggests a driver circuit to provide a bias voltage for power, but I ended up not needing it because the audio adapter includes one.
- 2x BA6286 motor controller to drive the mouth and dancing motors, since the Pi’s GPIO pins aren’t rated for this kind of current draw.
- USB power supply rated for at least 2A, like this wall adapter or this battery pack. I would have liked to use the AA batteries for power, but common DC-DC boost circuits like the MintyBoost only support up to 1A.
- Kapton tape for insulation and mounting.
Prototyping on a breadboard
With the parts picked out, I needed to test the components on a breadboard. First, I removed the plastic case from the audio adapter using a spudger and soldered wires to the headphone and microphone contacts to make it more breadboard-friendly. Then I wired up the “great sounding” version of the amplifier circuit by following their schematic, and next to it I wired the two motor controllers using the datasheet and some experimentation. I omitted the volume potentiometer in the final circuit because there is one built in to the audio adapter.
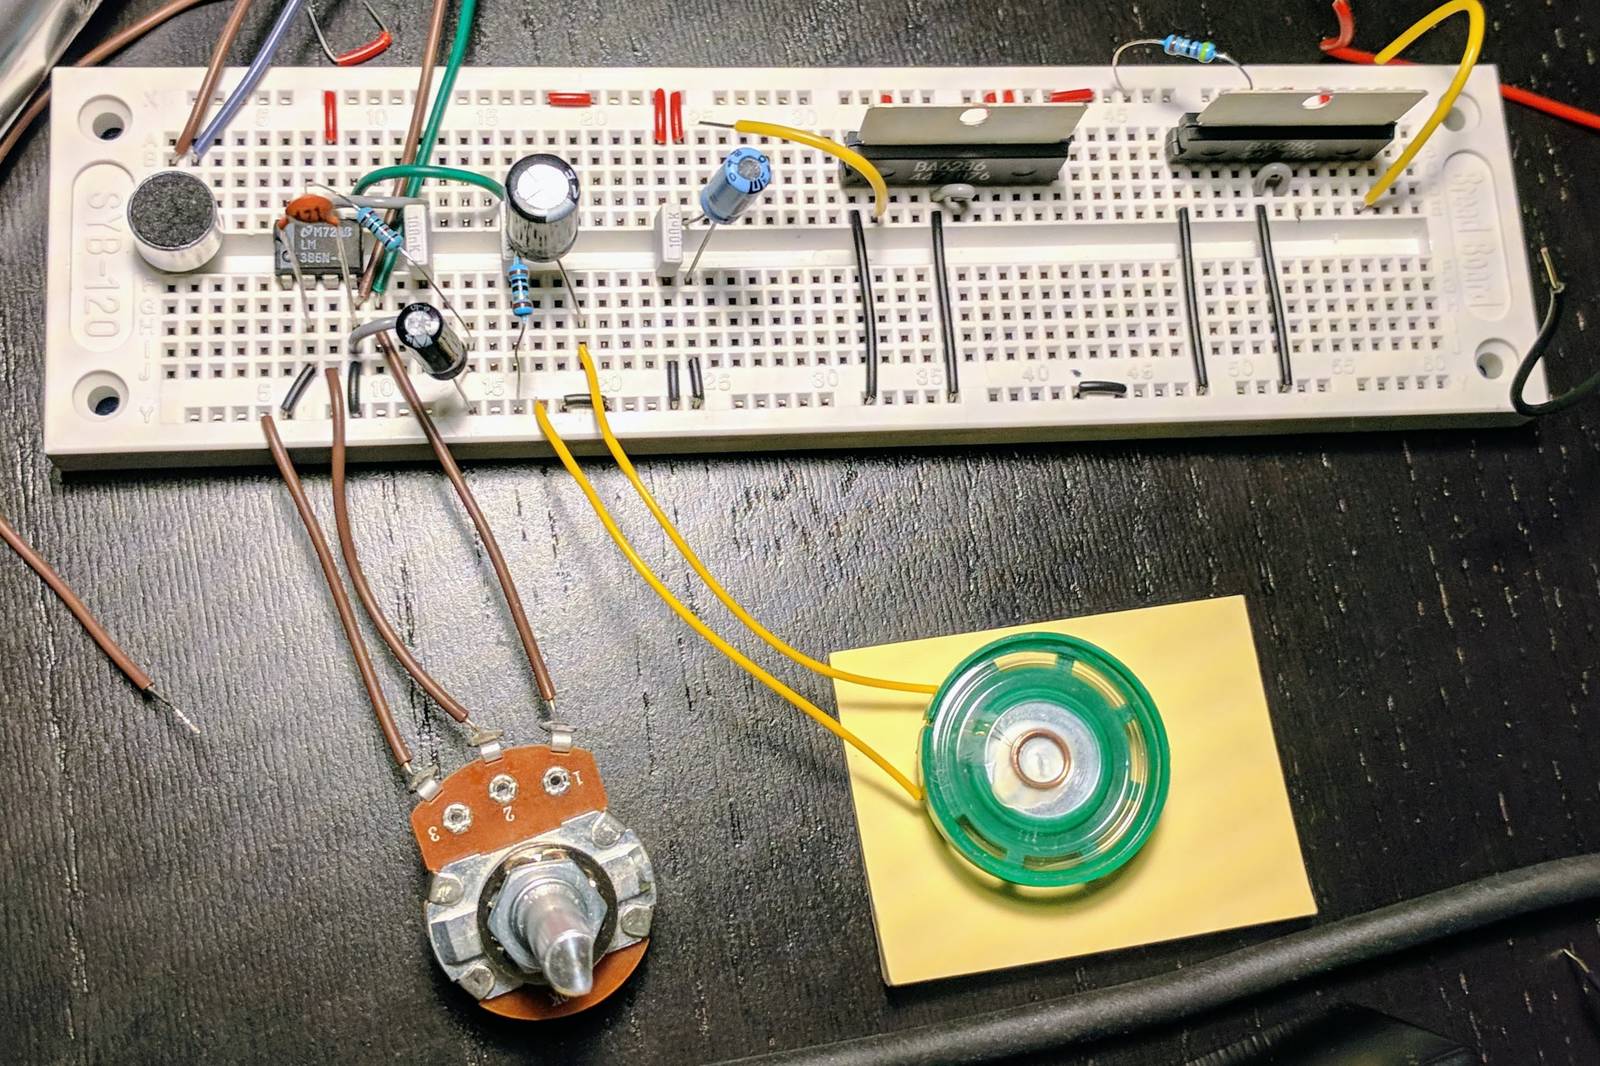
The wires leaving the audio circuit go to the audio adapter’s microphone in and headphone out.
The motor controller isolates the power supply to itself from the supply for the motor. While this is useful for high-power applications, the 5V USB supply is sufficient for the tree’s motors so I tied these pins together. The controller also has a pin to set the output current by connecting a resistor to 5V. On the breadboard, I used a potentiometer to determine the correct values. For the dancing motor, a 57 ohm resistor made the motor spin at the same speed as it did originally. The mouth needed the maximum current to stay open, so I just used a wire here. Before I soldered a connection from the logic input pins to the Pi, I measured the current through it by connecting an ammeter in series between each pin (pictured above as loose yellow wires connected to of the motor controllers) and a 3.3V supply. With the motor running, the current was on the order of microamps, which the Pi is able to drive without issues. Refer to the Raspberry Pi GPIO pinout when choosing pins.
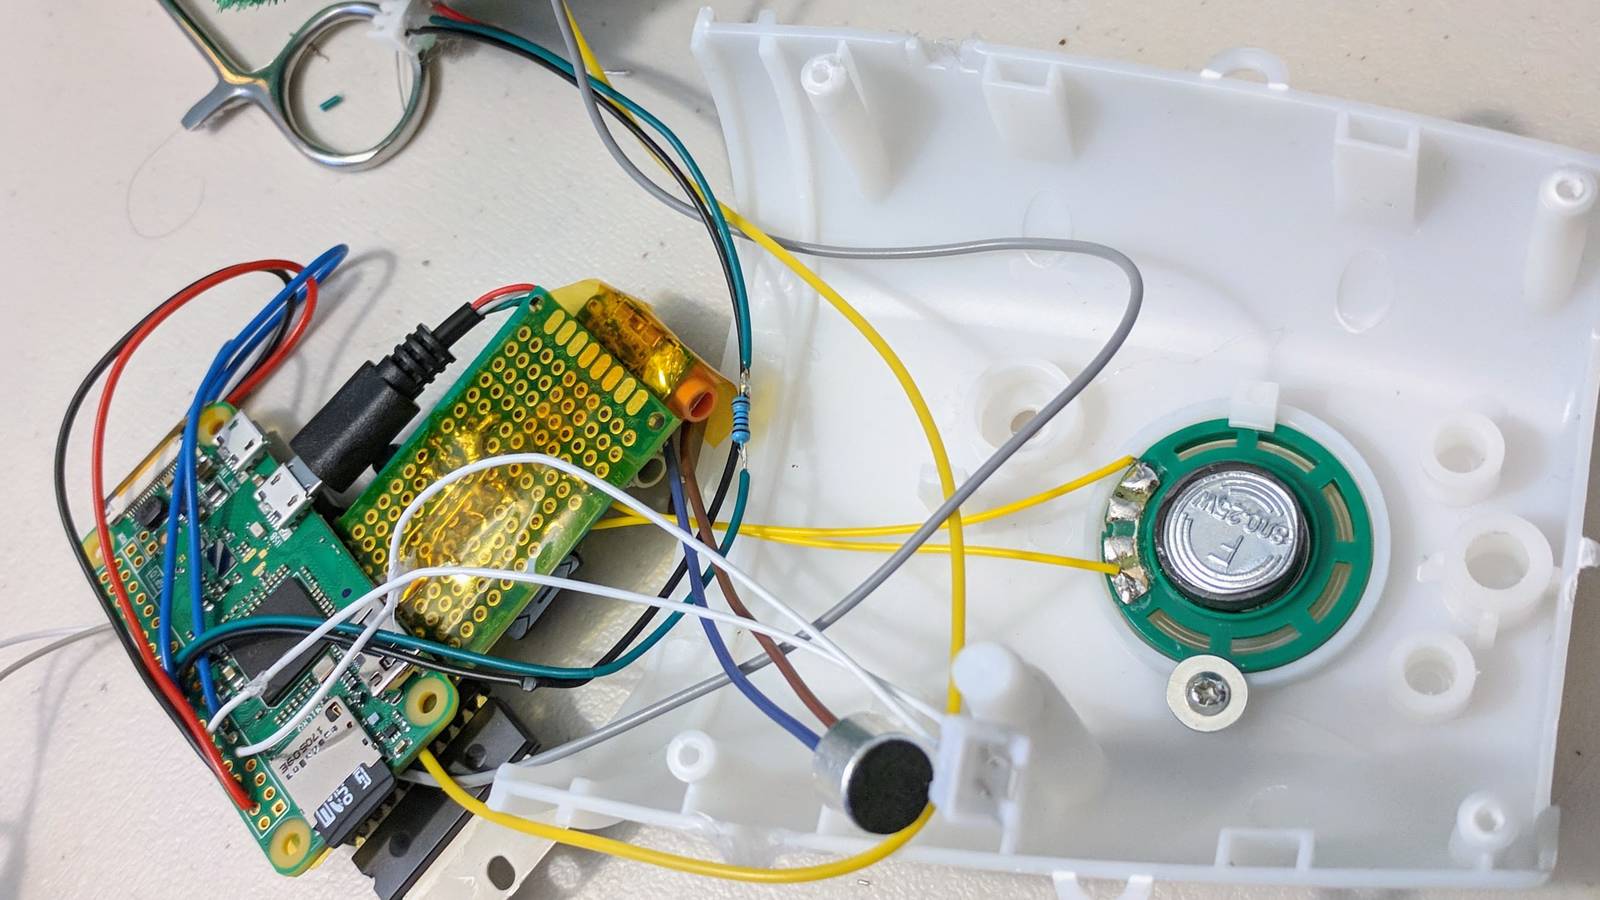
Final assembly
Since I planned to make only one of these trees, I soldered the two circuits directly to a piece of perfboard. While this meant I didn’t have to design and etch a printed circuit board, that might have been preferable: manually routing connections was time consuming, making intentional solder blobs for connections was annoying, and the extra wire length added some noise to the amplifier circuit. In the end, though, I was able to get the circuits to fit on a single board about the size of the Pi itself.
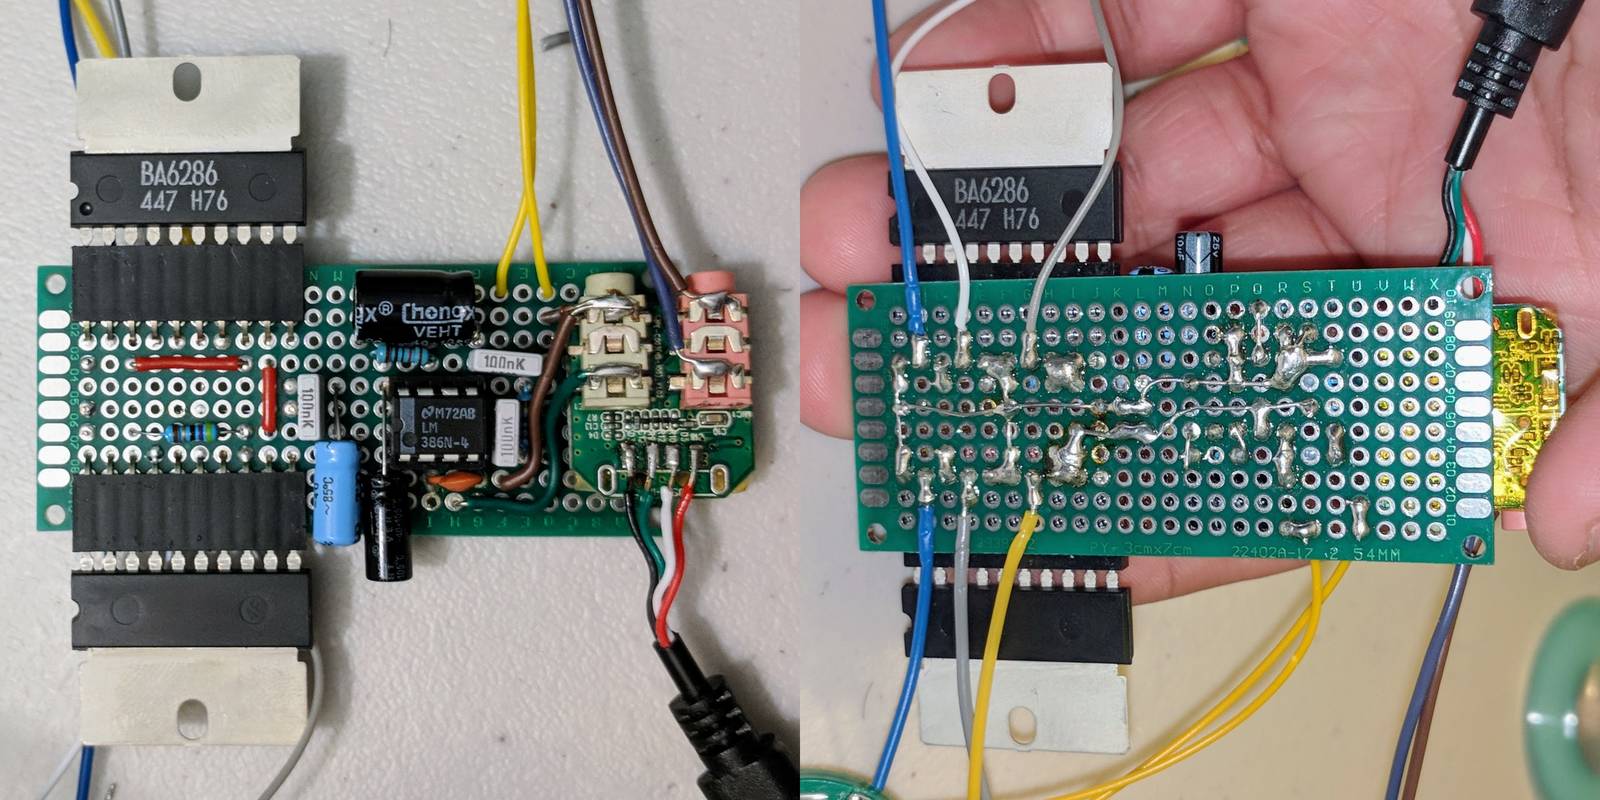
Because the bottom of the Pi and my circuits would be back-to-back, I insulated them with Kapton tape. Electrical tape probably would have been fine, but because the motor controllers got hot (but not burning) to the touch, I didn’t want to take any chances.
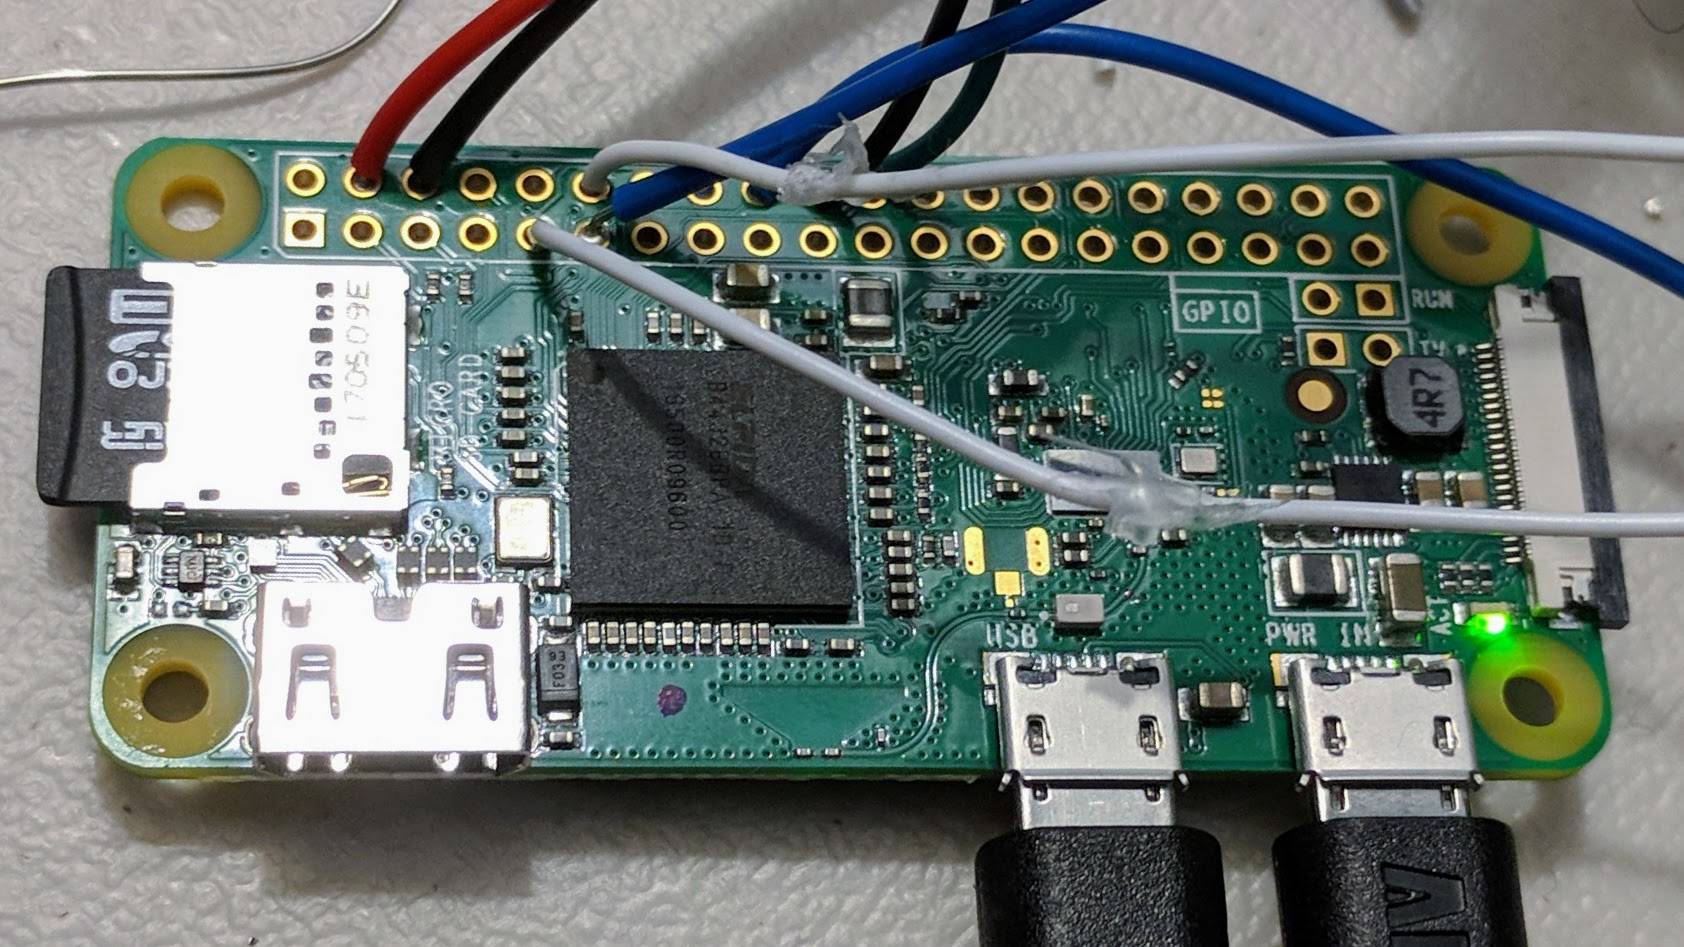
On the Pi, the red and black wires go to the 5V and ground “rails” on the perfboard. The white wires go to the switch, which works by tying GPIO pin 18 to ground when pushed. The blue wires go to the logic inputs of the motor controllers. The remaining wires are for the tree’s LEDs. I connected a resistor in series to limit the current through the LEDs to 20 mA. (The tree has another set of LEDs too, but I accidentally burned them out while probing the components to figure out how they were wired.)
Conveniently, the enclosure had a hole in front that was the perfect size for the microphone.
Not so conveniently, my parts were still too big to fit in the enclosure. My solution was to cut off the battery bay and two screw terminals for some extra space, which also lets me access the SD card without disassembling the tree for installing Raspbian and Wi-Fi configuration. (When assembling the enclosure, make sure that the SD card slot is facing the bottom.)
Before screwing the enclosure shut, I connected a micro USB cable to the Pi’s power input. Then I wrote down the GPIO pins the motors, button, and LEDs were connected to, and re-assembly was just the disassembly in reverse. I drilled a small hole in the battery cover for the USB cable before screwing it back on.
Setting up Alexa
Raspbian and access via local network
The Raspberry Pi is stuck inside the tree with no way to display anything, so a graphical interface would just be bloat. As a result, I used the Raspbian Stretch Lite image to start with. Download and install the image according to their instructions.
There is no keyboard, serial connection, or Ethernet port, so the next step is
to set up Wi-Fi and SSH before booting up the Pi for the first time. In the SD
card’s boot partition, create a basic wpa_supplicant.conf. You may have to
remove and reinsert the SD card into your computer if the boot partition isn’t
mounted after installing Raspbian.
# If you're not in the US, replace the country code for regulatory compliance
country=US
ctrl_interface=DIR=/var/run/wpa_supplicant GROUP=netdev
update_config=1

# WPA
network={
	ssid="your network name"
	psk="your network password"
	key_mgmt=WPA-PSK
}

# WEP
network={
	ssid="your WEP network name"
	key_mgmt=NONE
	wep_key0=0123456789
	wep_tx_keyidx=0
}

# Public network
network={
	ssid="public network name"
	key_mgmt=NONE
}

# Add more network entries and the tree will connect to the first available one
Also in the boot partition, create an empty file named ssh to enable SSH.
Unmount the SD card from your computer, put it in the tree’s Pi, and plug in the
tree to your USB power supply. With this configuration, Raspbian will boot,
connect to one of the specified Wi-Fi networks, and enable SSH with the default
credentials.
Then, discover the Pi’s IP address using arp, nmap, or another tool
according to this Stack Exchange post. With the IP address in
hand, connect to the Pi using the default username “pi” and password
“raspberry”. This is very insecure – once connected, change the password via
passwd to prevent others on your network from accessing your Pi.
I also recommend these other steps for security hygiene:
- Set up key-based login and optionally disable password login over SSH.
- Install fail2ban to prevent brute-force login attacks.
- Set up automatic updates via the
unattended-upgradesandapt-listchangespackages.
AlexaPi for Alexa
I decided to use AlexaPi to actually call the Alexa Voice Service instead of Amazon’s reference app because AlexaPi lets you choose a wakeword engine, supports GPIO pins for triggers and status lights, and none of its components expire after 120 days.
First, follow their instructions to set up your Amazon account. Then, install AlexaPi on your Pi:
# Install here for ease of use with their scripts
cd /opt

# Clone the AlexaPi repository
sudo apt-get install git
sudo git clone https://github.com/alexa-pi/AlexaPi.git
cd AlexaPi

# Latest from dev branch as of this writing, includes Snowboy wakeword detector
sudo git checkout 8cc9f02

# Install depenencies and setup account with their script
sudo src/scripts/setup.sh
Then, I needed to set up PulseAudio to run in system-wide mode. The AlexaPi
project has some instructions that mostly worked for me. I
opted to use the VLC handler, but audio input did not work out of the box. What
worked for me was to manually specify the input device rather than use “pulse”
in AlexaPi’s configuration. By default, this configuration is in
/etc/opt/AlexaPi/config.yaml:
sound:
  # Name of your microphone device
  # If you provide an invalid one, the log (`journalctl -u AlexaPi.service`)
  # gives you a list of valid devices during startup
  input_device: "USB Audio Device: - (plughw:1,0)"

  playback_handler: "vlc"

  output: "pulseaudio"
  output_device: ""

  # Set this to the highest level that doesn't distort
  default_volume: 80
I also needed to configure ALSA to work with PulseAudio. Paste this into
/etc/asound.conf:
pcm.!default {
	type pulse
}
ctl.!default {
	type pulse
}
At this point, you should be able to reboot your Pi and once Alexa says “Hello”,
the tree will work as an Echo (albeit poorly). If not, check the log via
journalctl -u AlexaPi.service to see what specifically went wrong. If you
still need to set up the output device, I found the Arch Wiki’s documentation
on PulseAudio useful.
While testing, I determined that Snowboy, a purpose-built hotword
detector, was much more reliable than using the general-purpose speech
recognizer CMUSphinx for this purpose. To enable this, in AlexaPi’s
config.yaml, first disable the Sphinx recognizer and then enable Snowboy:
triggers:
  pocketsphinx:
    enabled: false

  snowboy:
    enabled: true
    voice_confirm: true

    model: "{distribution}/alexa/alexa_02092017.umdl"
    sensitivity: 0.5
To test these changes quickly, you can restart just the AlexaPi service without
restarting the entire Pi with sudo systemctl restart AlexaPi.service. The
wakeword will still be “Alexa”, but it should be much more responsive.
Given that I just stuffed Alexa into a Christmas tree, I figured an appropriate wake phrase would be “Oh Christmas tree”. On Snowboy’s dashboard, you can train and download a new model for any phrase after creating an account. Alternately, you can just use my model, though it might not work very well for you because it’s trained only on my voice. You can also record some samples to improve my model on its page.
Once you have a model file, copy it to the Pi somewhere the alexapi account can
access, like inside /opt/AlexaPi, using scp or a graphical tool like
FileZilla. Then, edit AlexaPi’s configuration to use the model:
triggers:
  snowboy:
    model: "/opt/AlexaPi/Oh_Christmas_Tree.pmdl"
Finally, set up the GPIO pins to the pins so that they match the the pins you chose earlier for the motors, lights, and button. To test the mouth motor, I assigned its pin to the playback light. When testing, if the mouth moves but does not open, its motor is spinning in the wrong direction. Change the configuration to the mouth’s alternate pin to spin the motor in the other direction and the mouth should open for all of Alexa’s response.
My complete AlexaPi config.yaml is available here.
Moving the mouth naturally
AlexaPi does not support animatronic mouth movements out of the box, so I researched how similar projects achieved mouth movements:
- Furlexa’s gearing makes the mouth open and close continuously the entire time the motor is running. Unlike Furlexa, the tree’s mouth opens when power is applied and closes when it is removed.
- The Echo Dot-based projects, like Project Yorick and another Christmas tree, apply a threshold to the Echo’s sound output to determine the mouth’s position. Unfortunately, these projects use dedicated hardware to do this, which I did not want to add.
- This Billy Bass Alexa clone uses a Raspberry Pi for Alexa but has a separate microphone next to the speaker to capture the sound data needed to animate the mouth. This is another example of extra hardware that should not be necessary.
My first thought was to patch AlexaPi to analyze the audio as it is being played. However, Amazon returns an MP3, and AlexaPi hands off playback responsibility to VLC. Decoding this again outside VLC just to control the motors seemed redundant.
PulseAudio provides pacat to redirect audio streams to files and
vice versa, much like cat does for text. I used this to capture the system
audio output in realtime with the RPi.GPIO Python library to
control the motors in my script. Change the mouth pin and
PulseAudio source to match your hardware, then run the script (ideally inside a
tmux or screen session so that you can disconnect from the Pi) to enable
natural mouth movements.
-
I picked up my Pi Zero W at Micro Center during a previous trip to the east coast. As of this post, they have them for $5. ↩︎
-
At Vetco, this item corresponds to three sizes of microphone. I went with the largest one they had because it has an integrated amplifier circuit. ↩︎